Explore your Workspace
Upon sign up at app.adaline.ai, you’ll automatically receive:- A private teamspace to organize your projects.
- A project to contain your prompts and datasets.
- A default prompt to begin customizing.
- An empty dataset to store and organize your test cases.
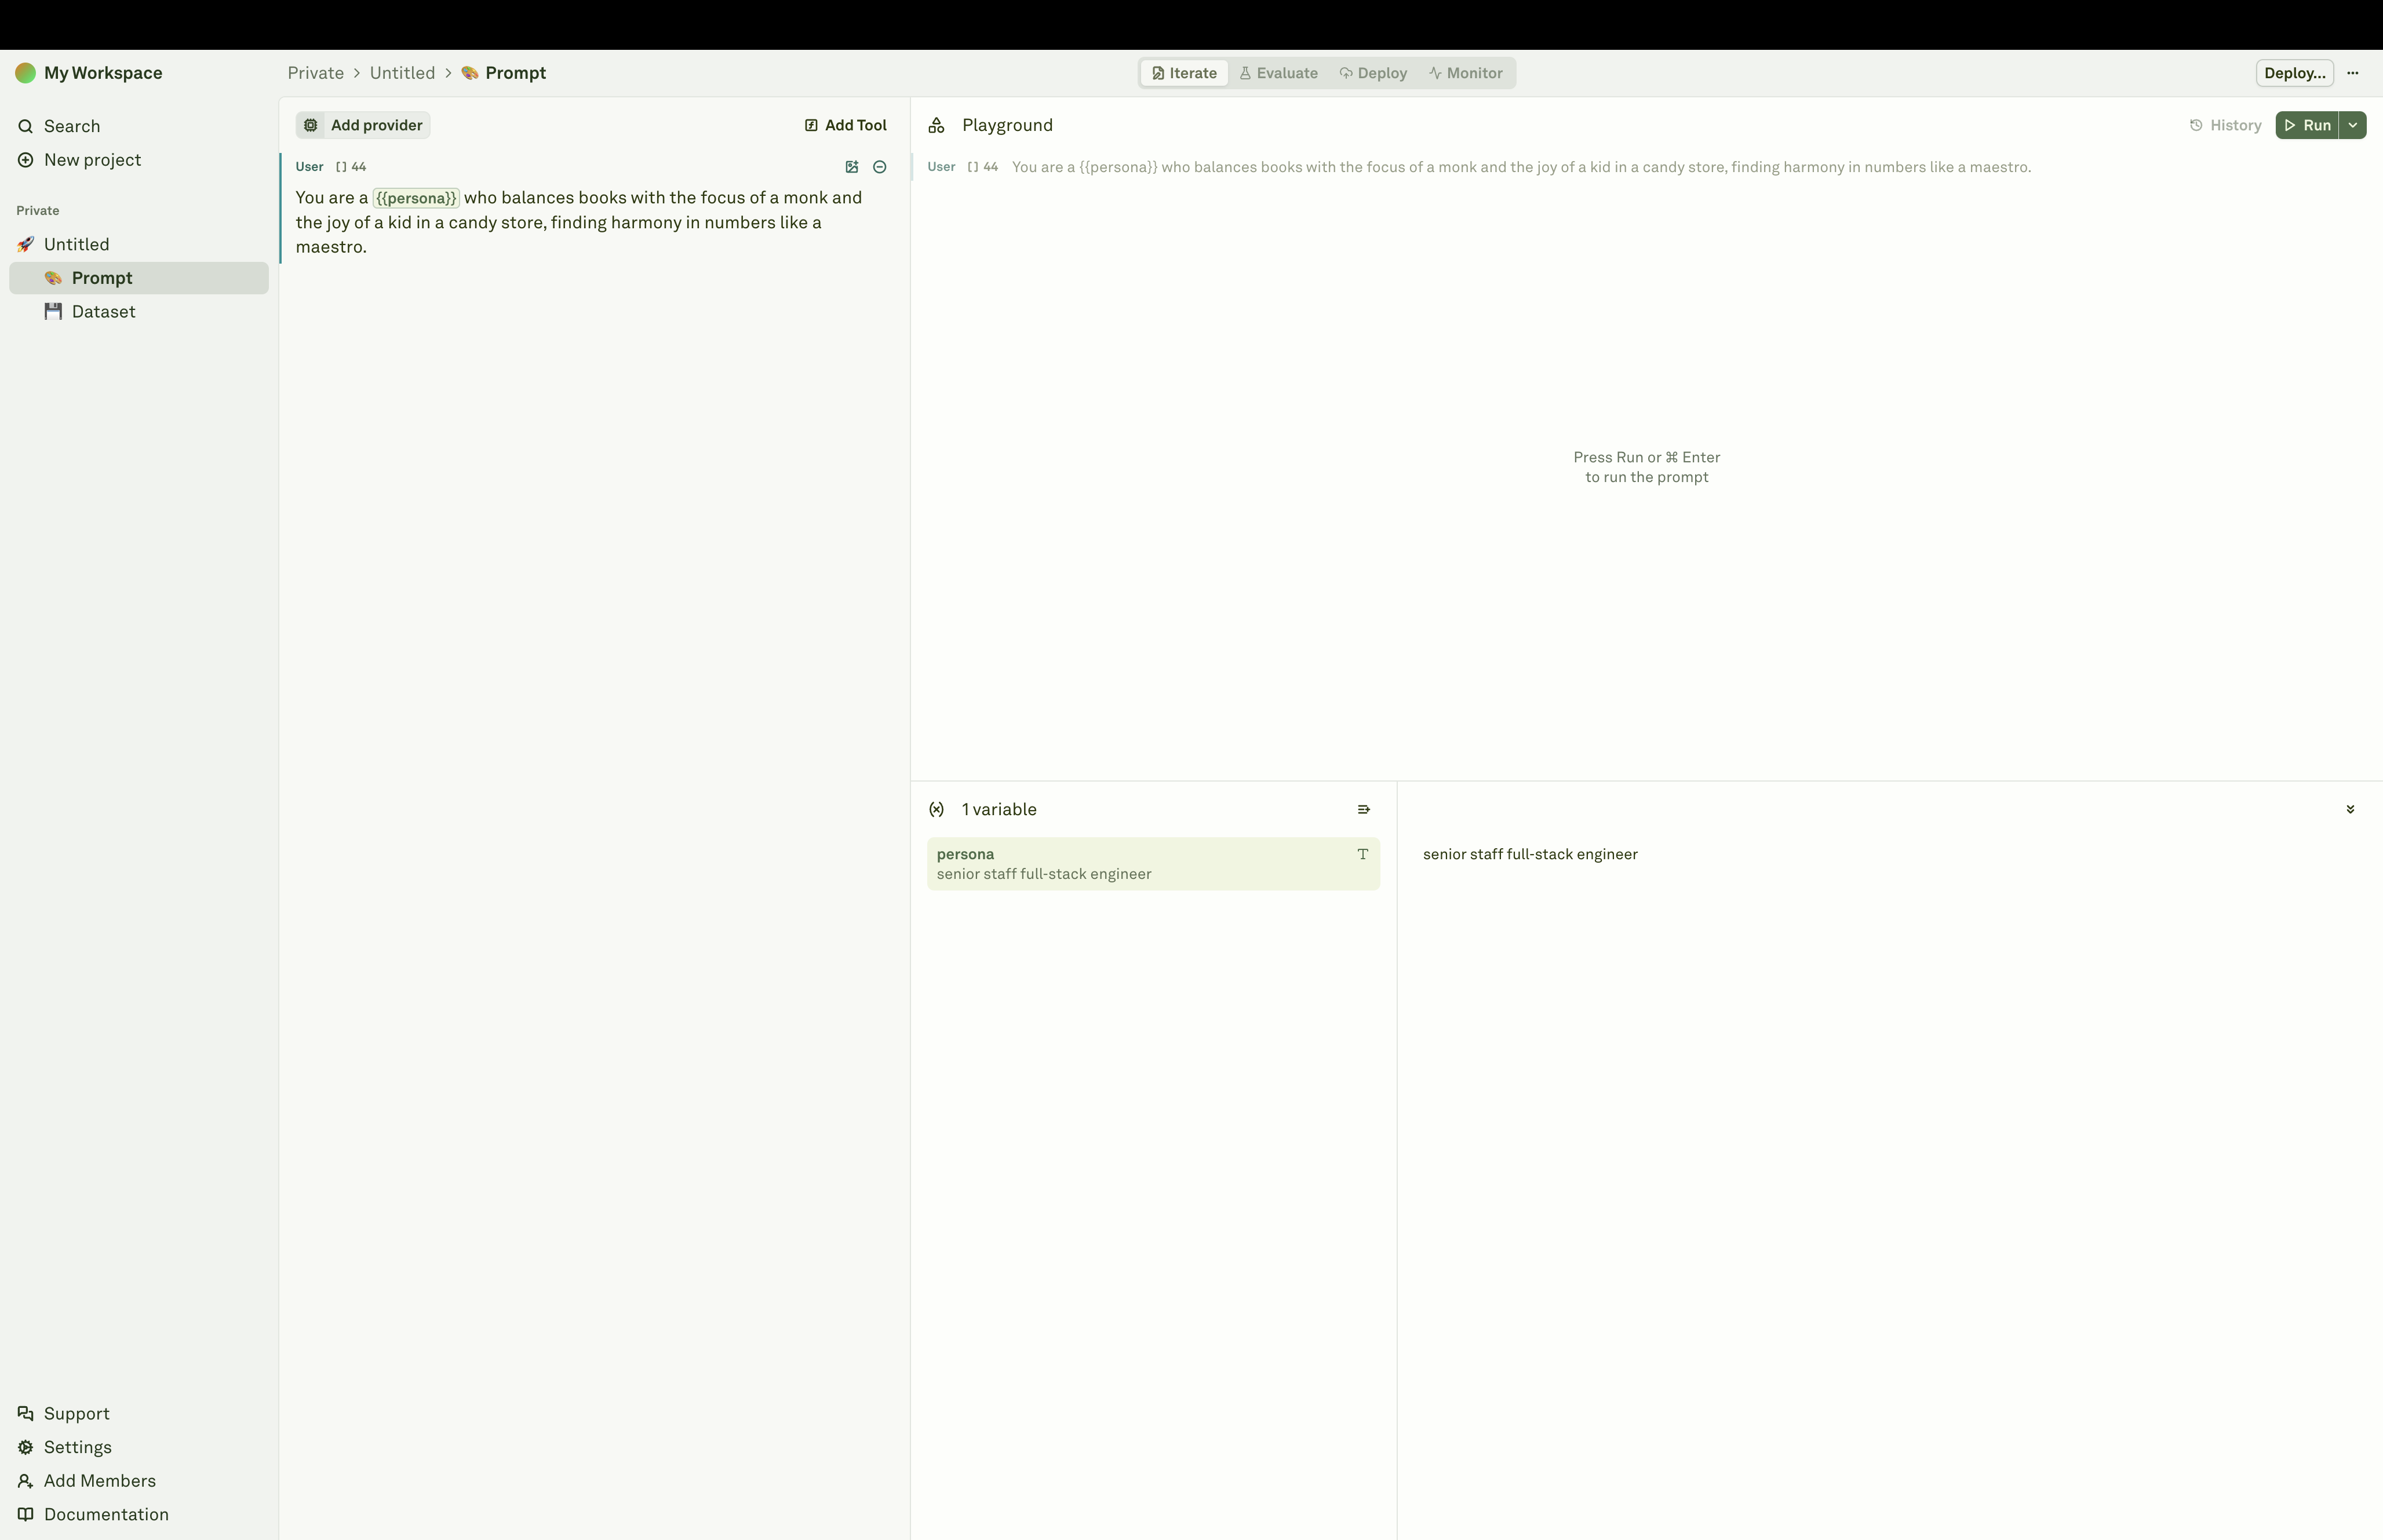
Setup a LLM provider
A LLM provider securely stores your API keys / secrets and is used to run your prompts and evaluations.- In the sidebar, click Settings → Providers.
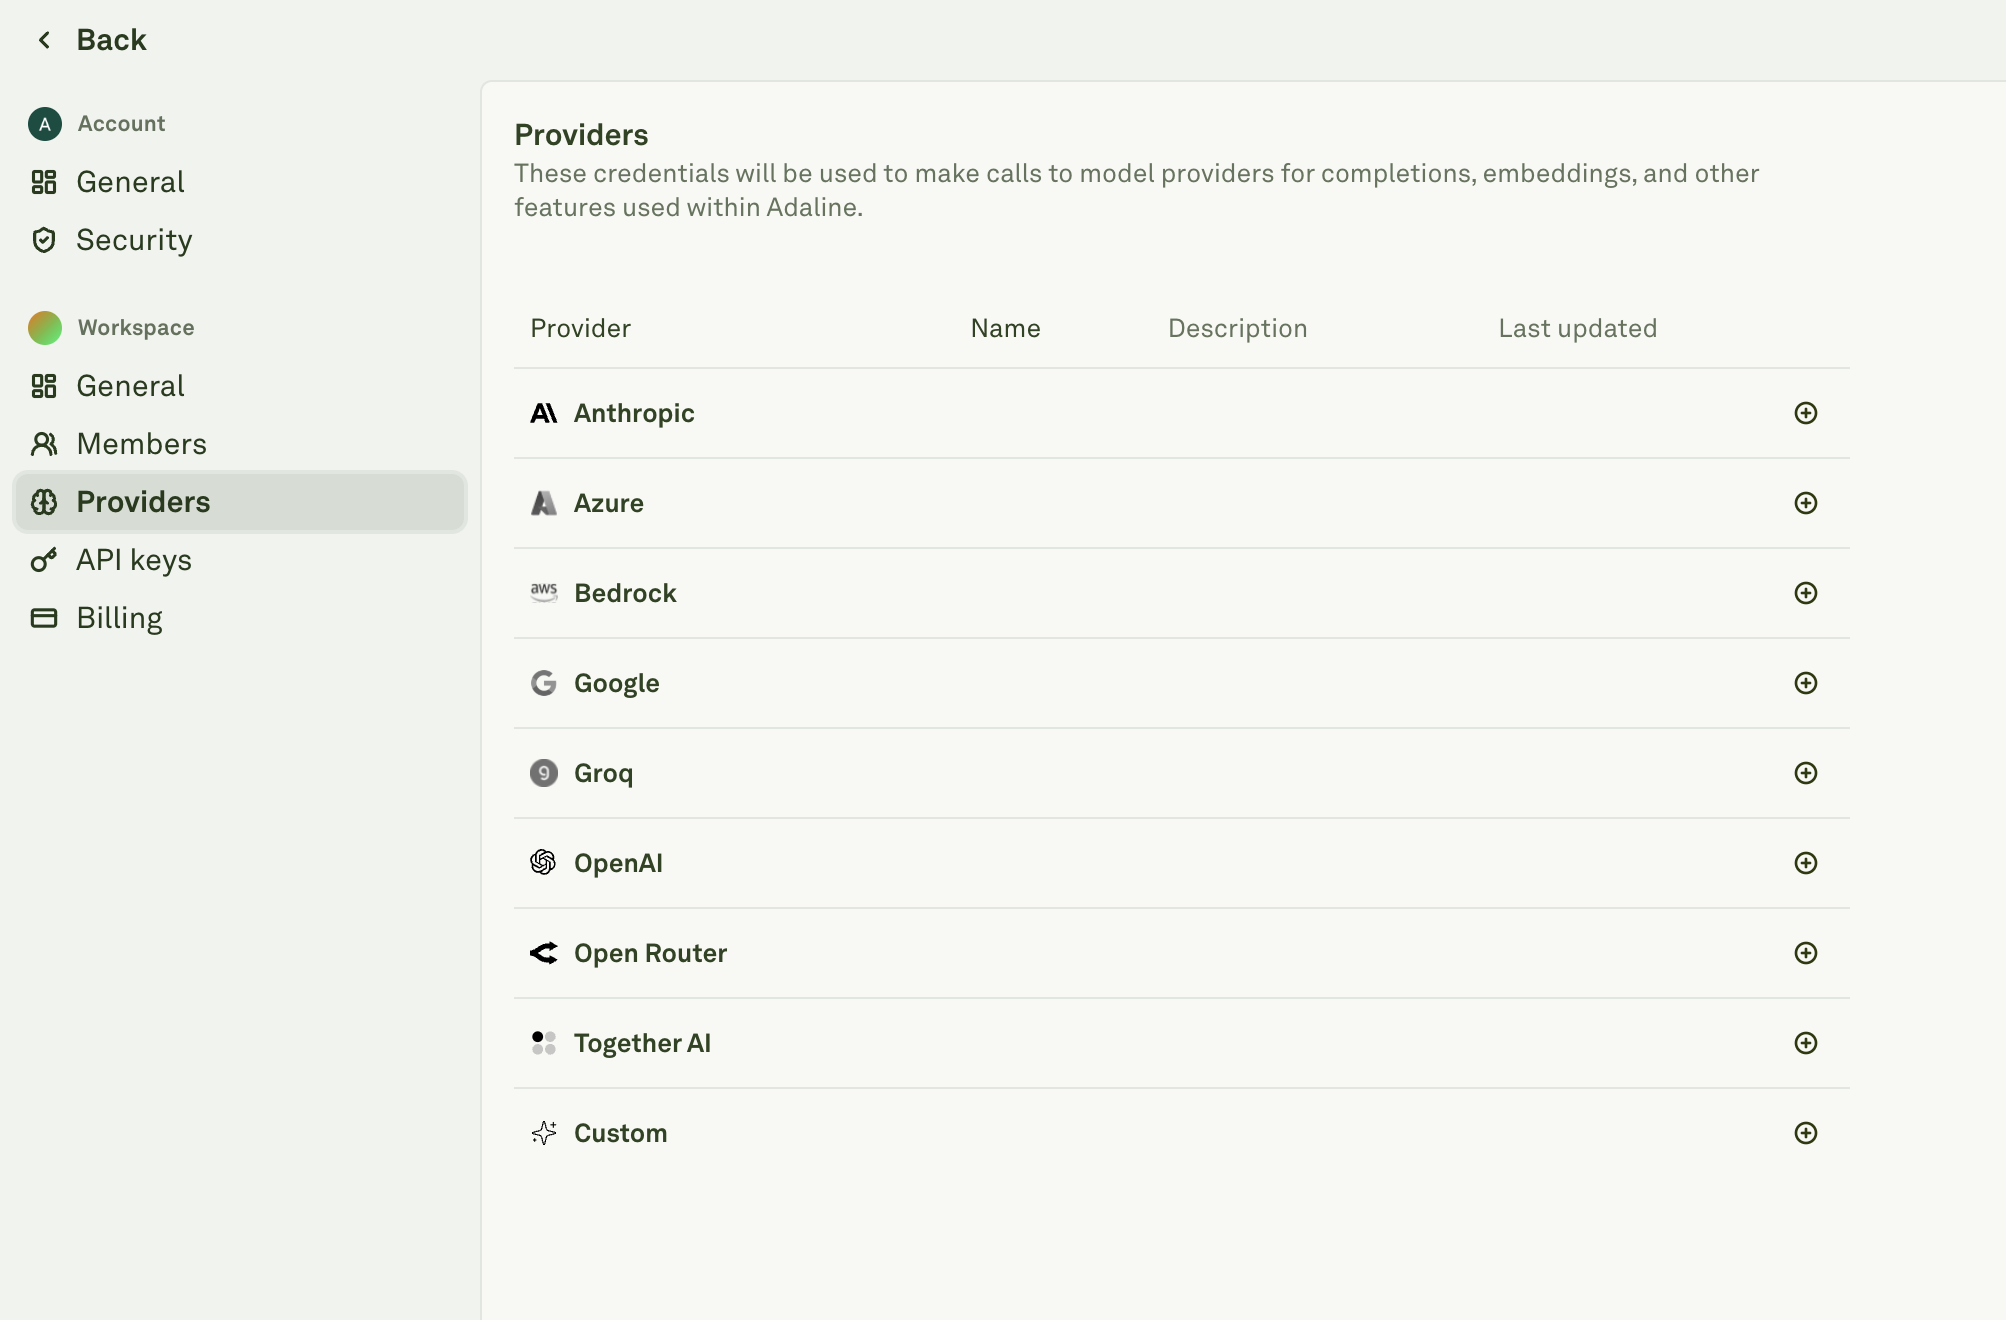
- Click on the plus icon to setup a provider of your choice. For this guide, we will use OpenAI. Click here to learn more about all providers.
- Paste your OpenAI API key and click Create.
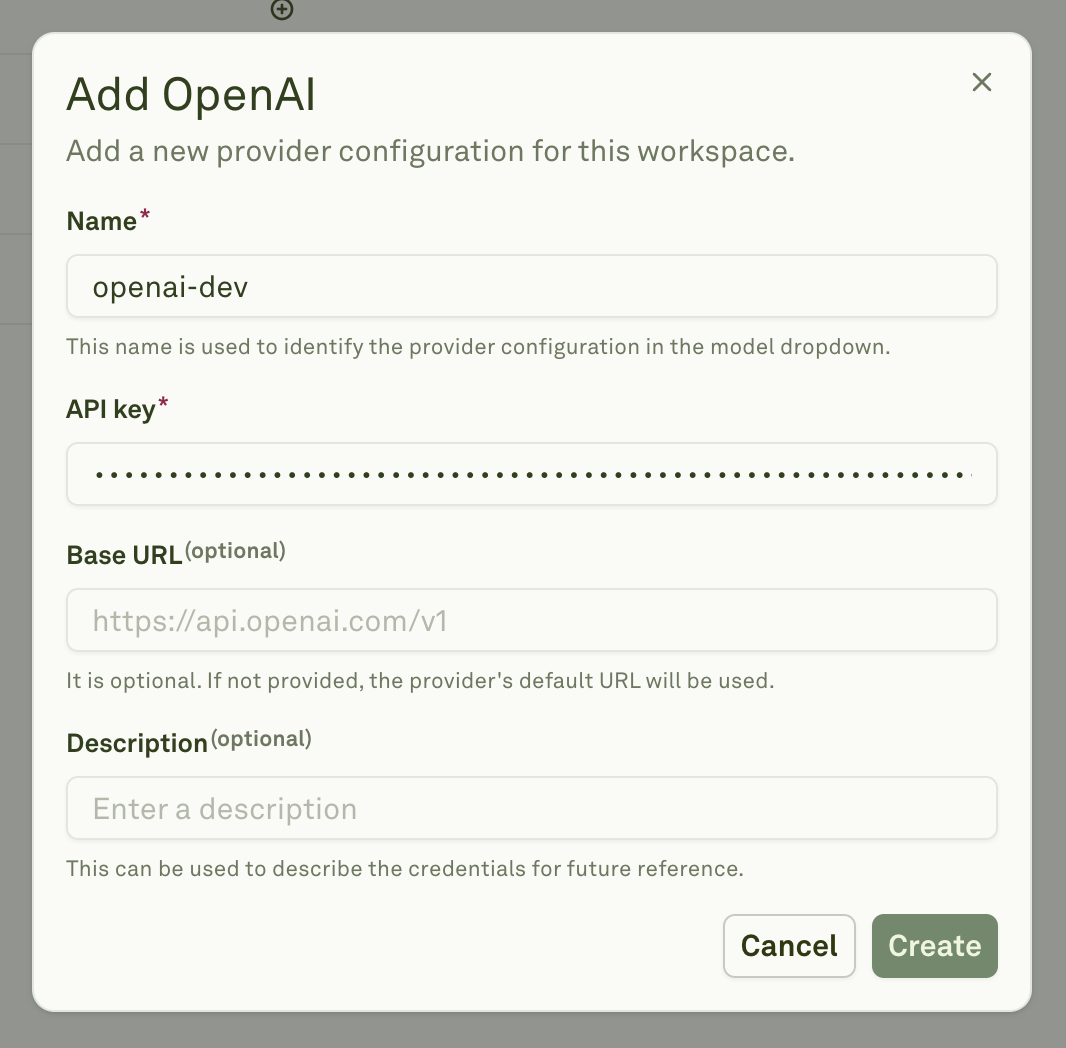
- Your workspace now has access to all OpenAI models.
Setup your Prompt
A prompt is a collection of model parameters, messages and tools that are sent to a model to generate a response.- Click on < Back button in sidebar and then click on Prompt again to view the Editor and Playground.
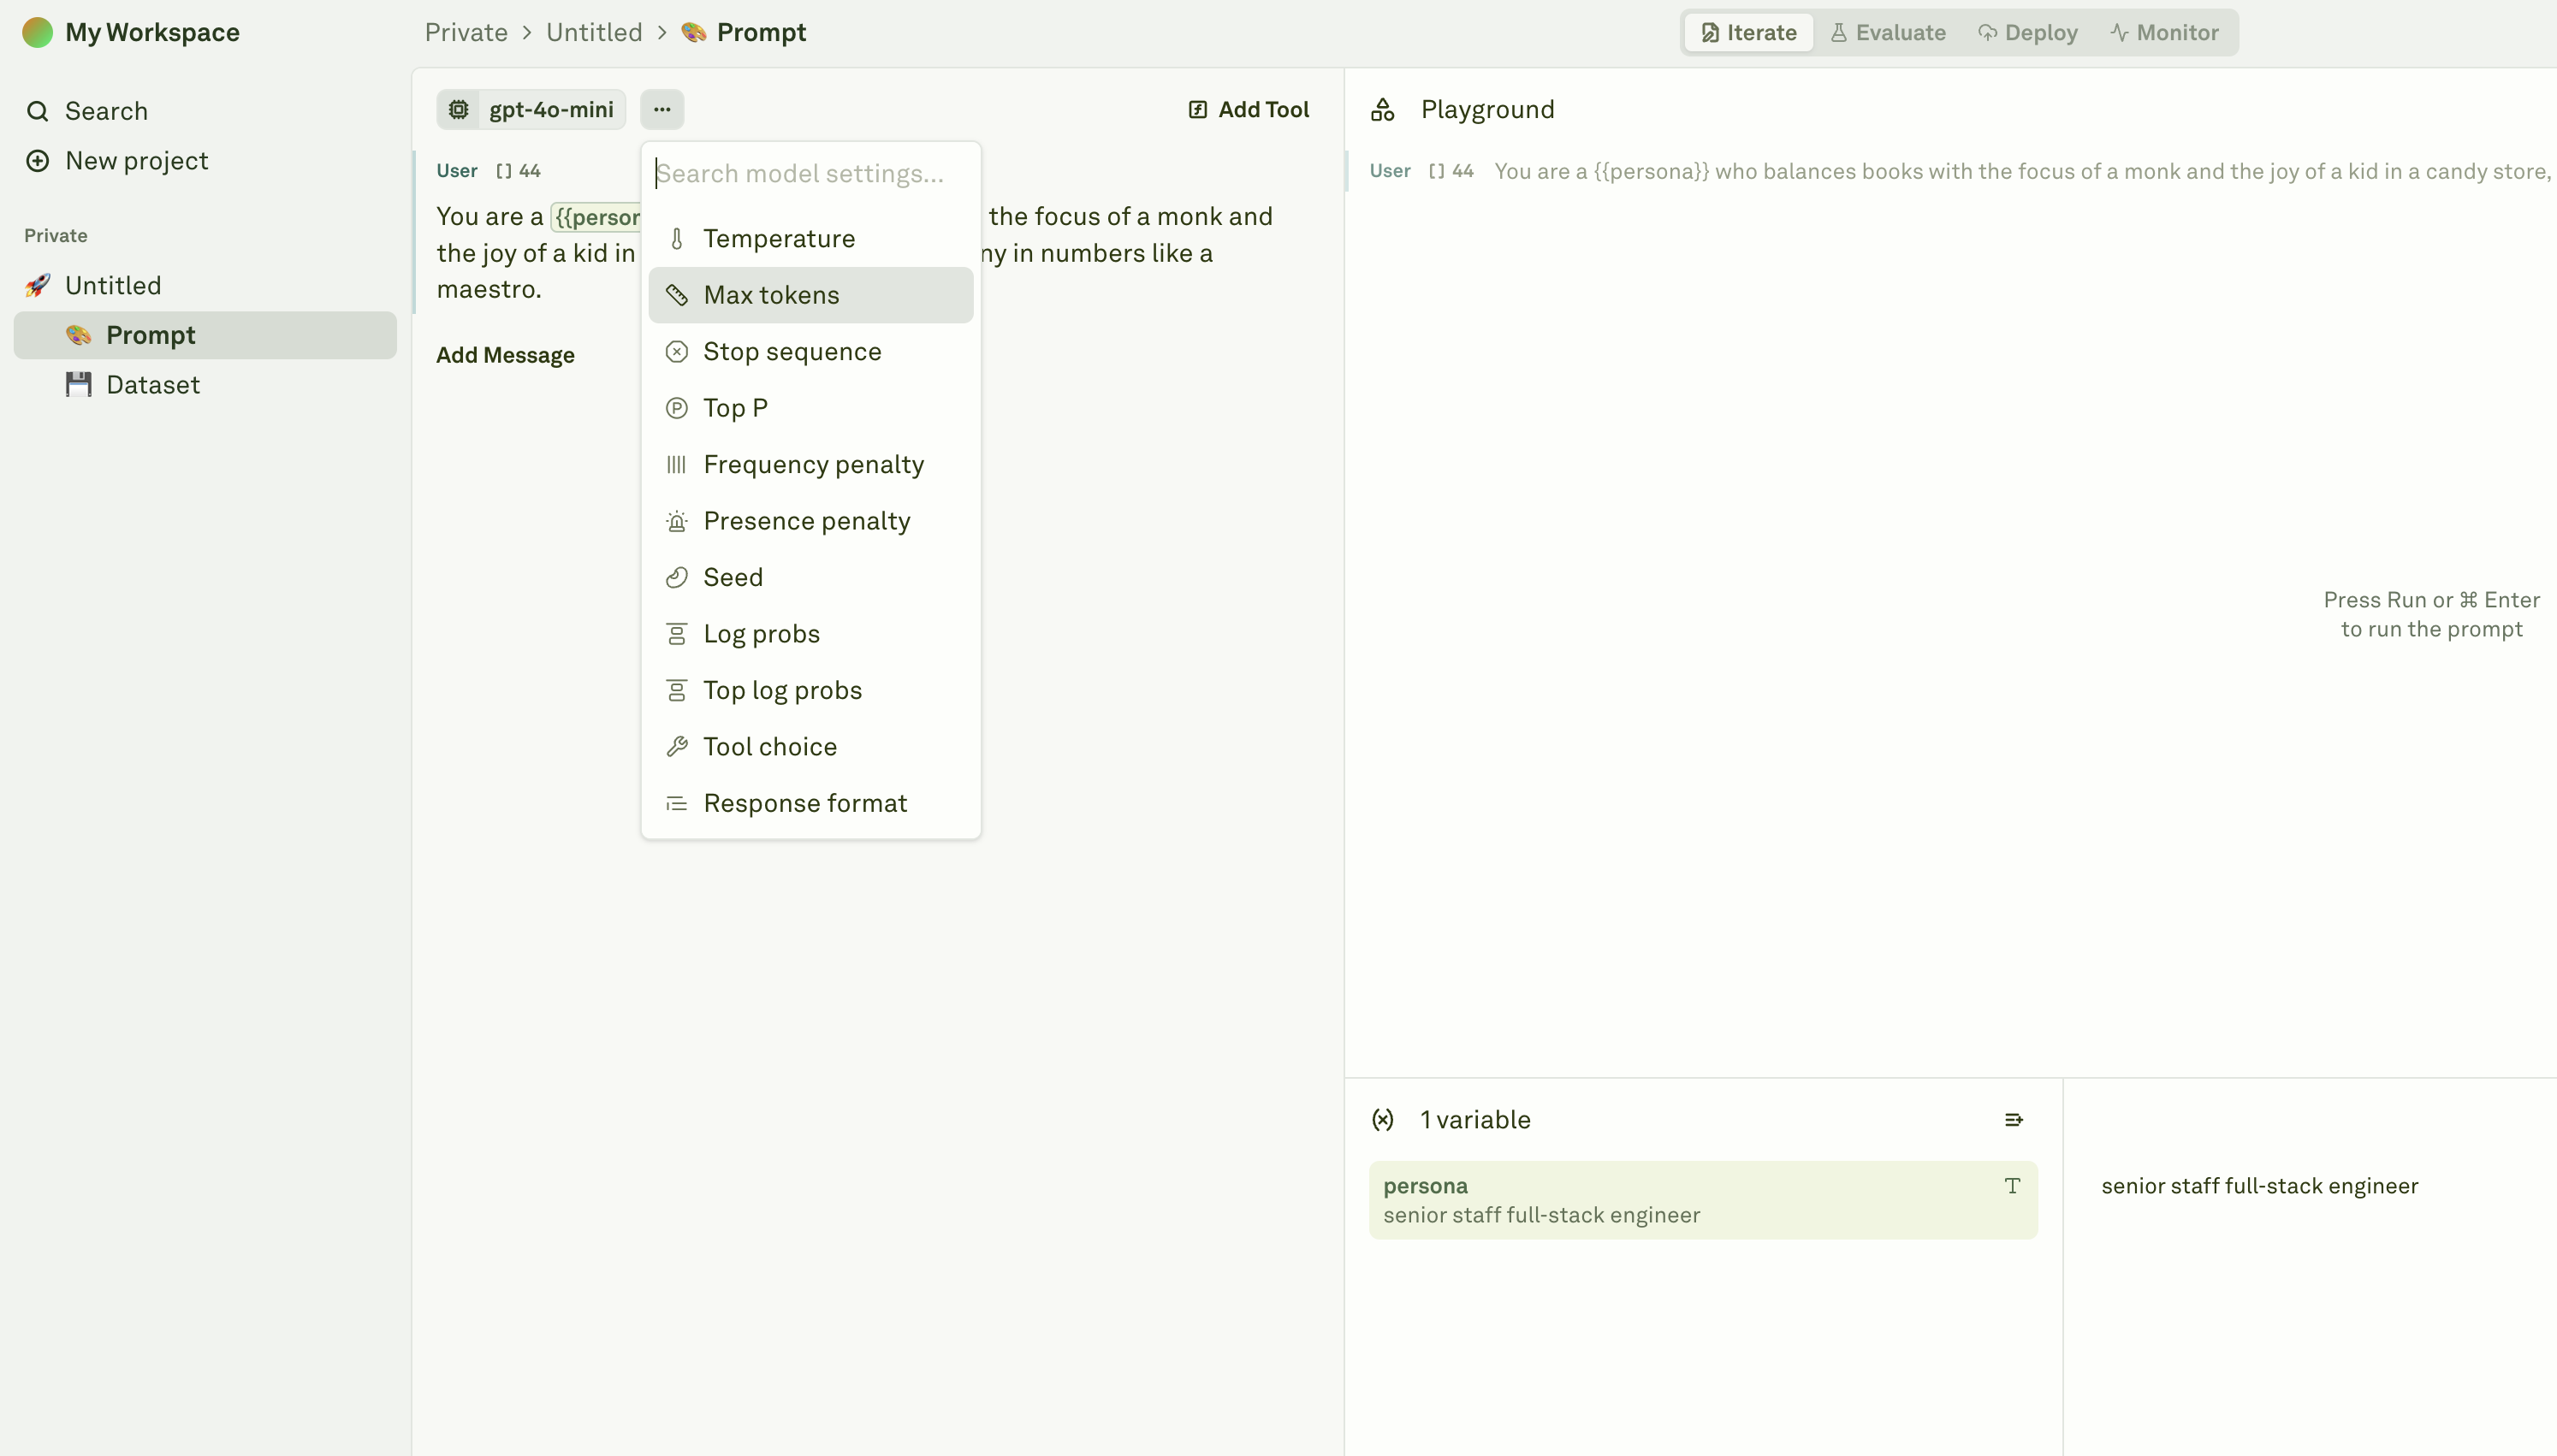
- Click on Select a model and choose a model to run your prompt.
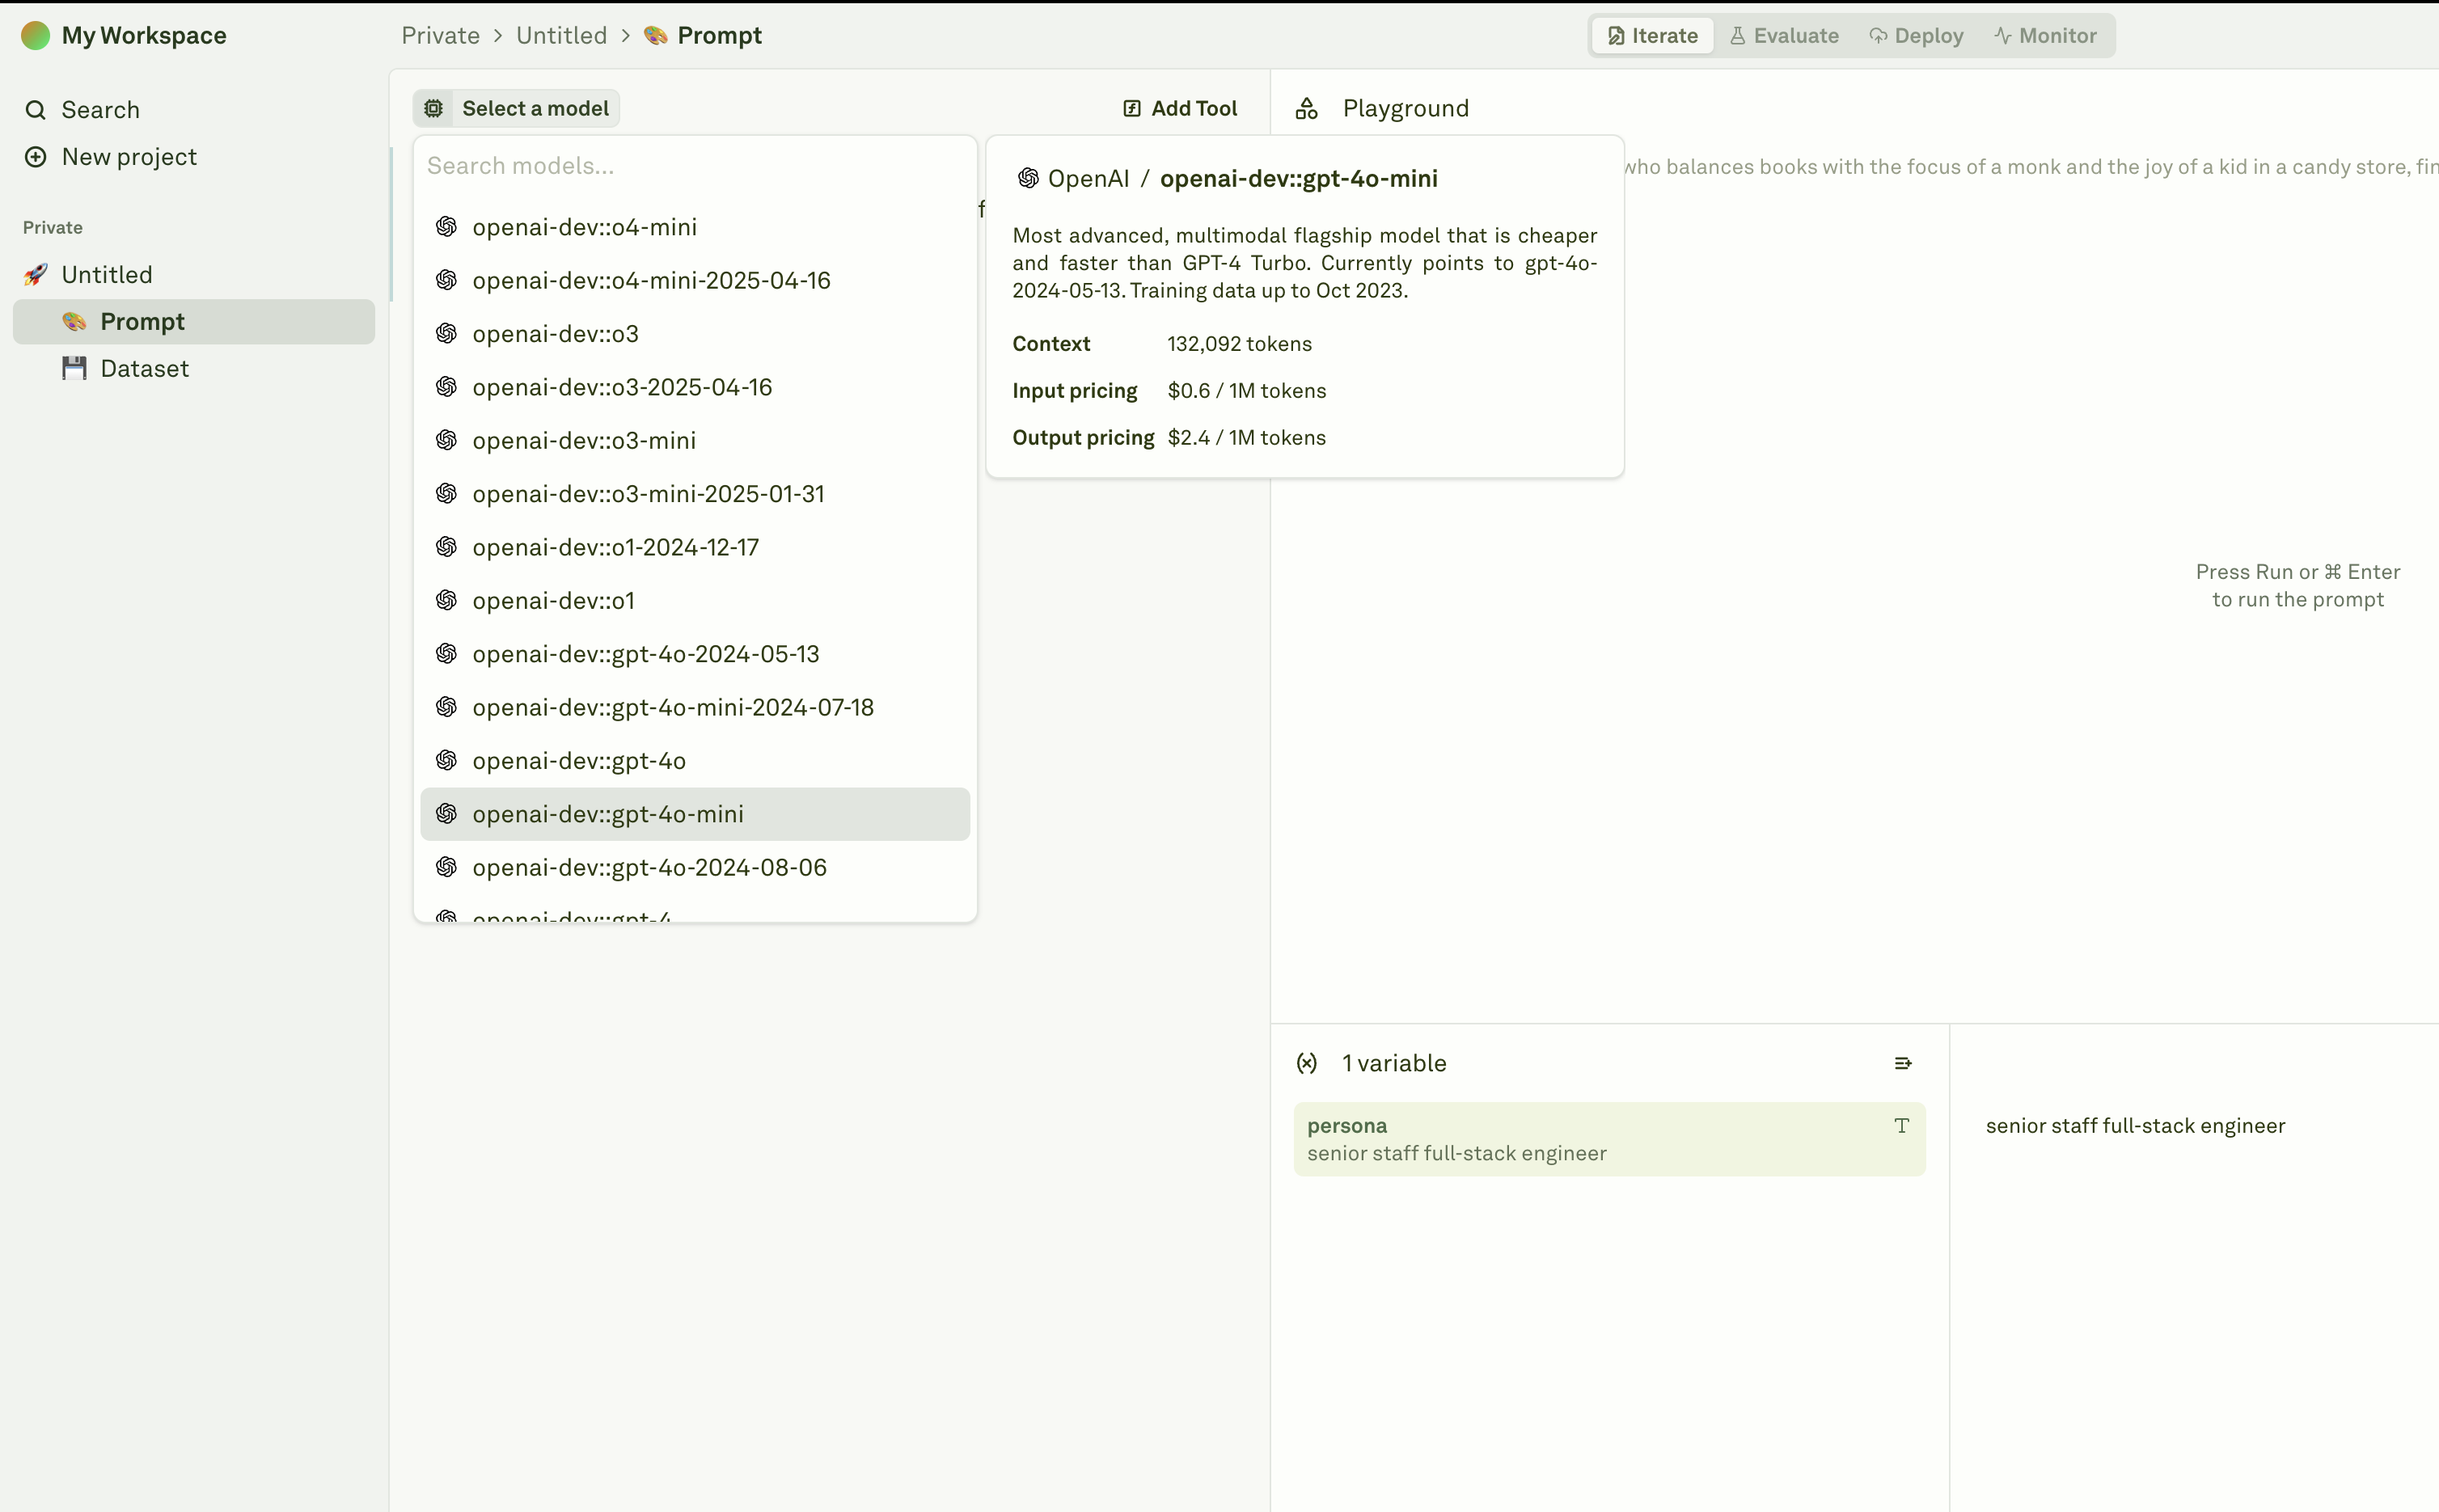
- (Optional) You can click on ellipsis (three dots) next to the model to configure model parameters such as temperature, max tokens, etc.
Run your Prompt
Before you run your prompt, notice the Variables section in the bottom right to set variable values. Variables are placeholders for values that will be used in your prompt at runtime. These usually represent the end-user inputs, additional context, outputs from previous prompts, etc.- Click on Run button (top right) in the Playground to run your prompt.
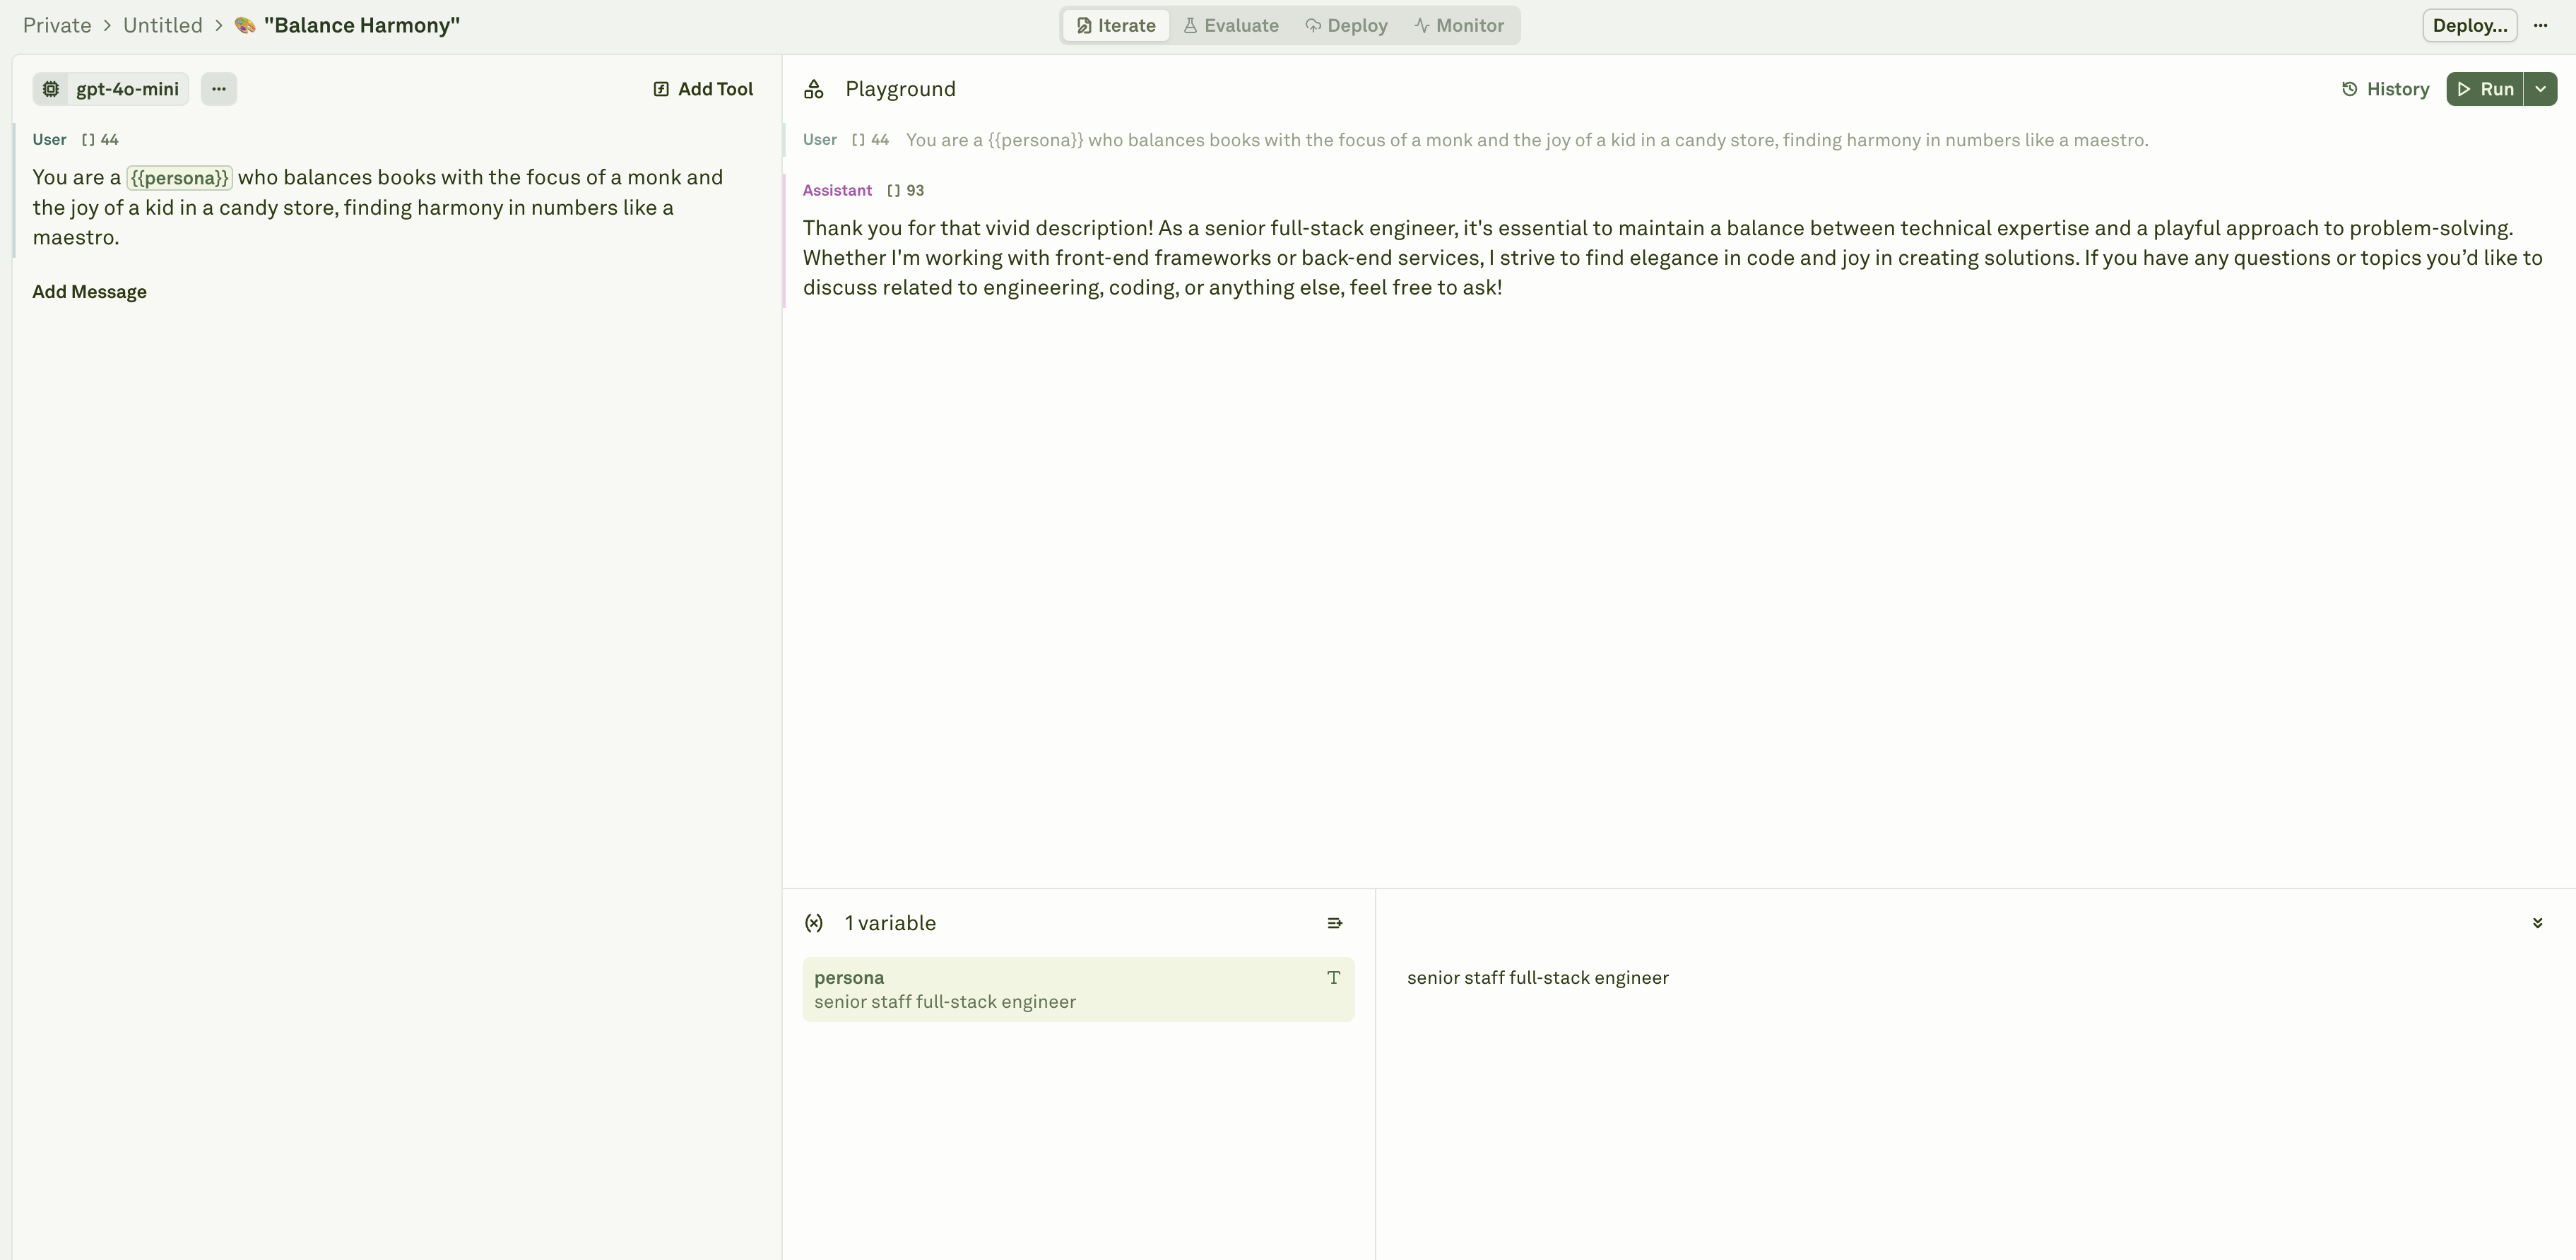
- (Optional) This guide assumes the default prompt but you can edit the prompt and variables to suit your use case.
- Add as many messages as you need for zero shot or few shot prompts.
- Update roles per message by clicking on the role (eg. User in the screenshot).
- Add as many variables as you need by typing variable name between double curly brackets
{{}}. - Update the variable values in the Variable Editor.
Setup your Dataset
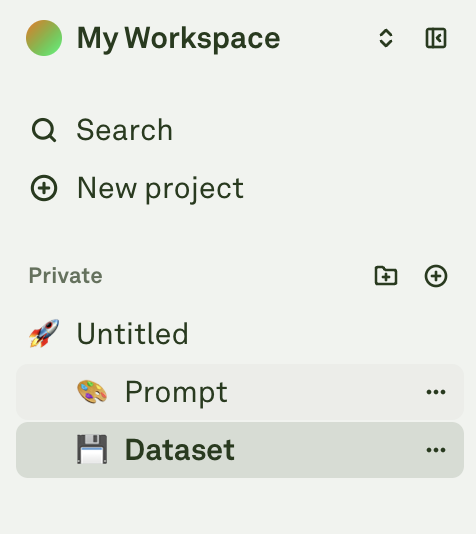
Before you can evaluate your prompt responses, you need to setup a dataset. A dataset is a collection of test cases that you can use to evaluate your prompt responses. Each column in the dataset represents a variable from the prompt. Each row in the dataset represents a test case.- Click on Dataset in the sidebar.
- Click on Add column.
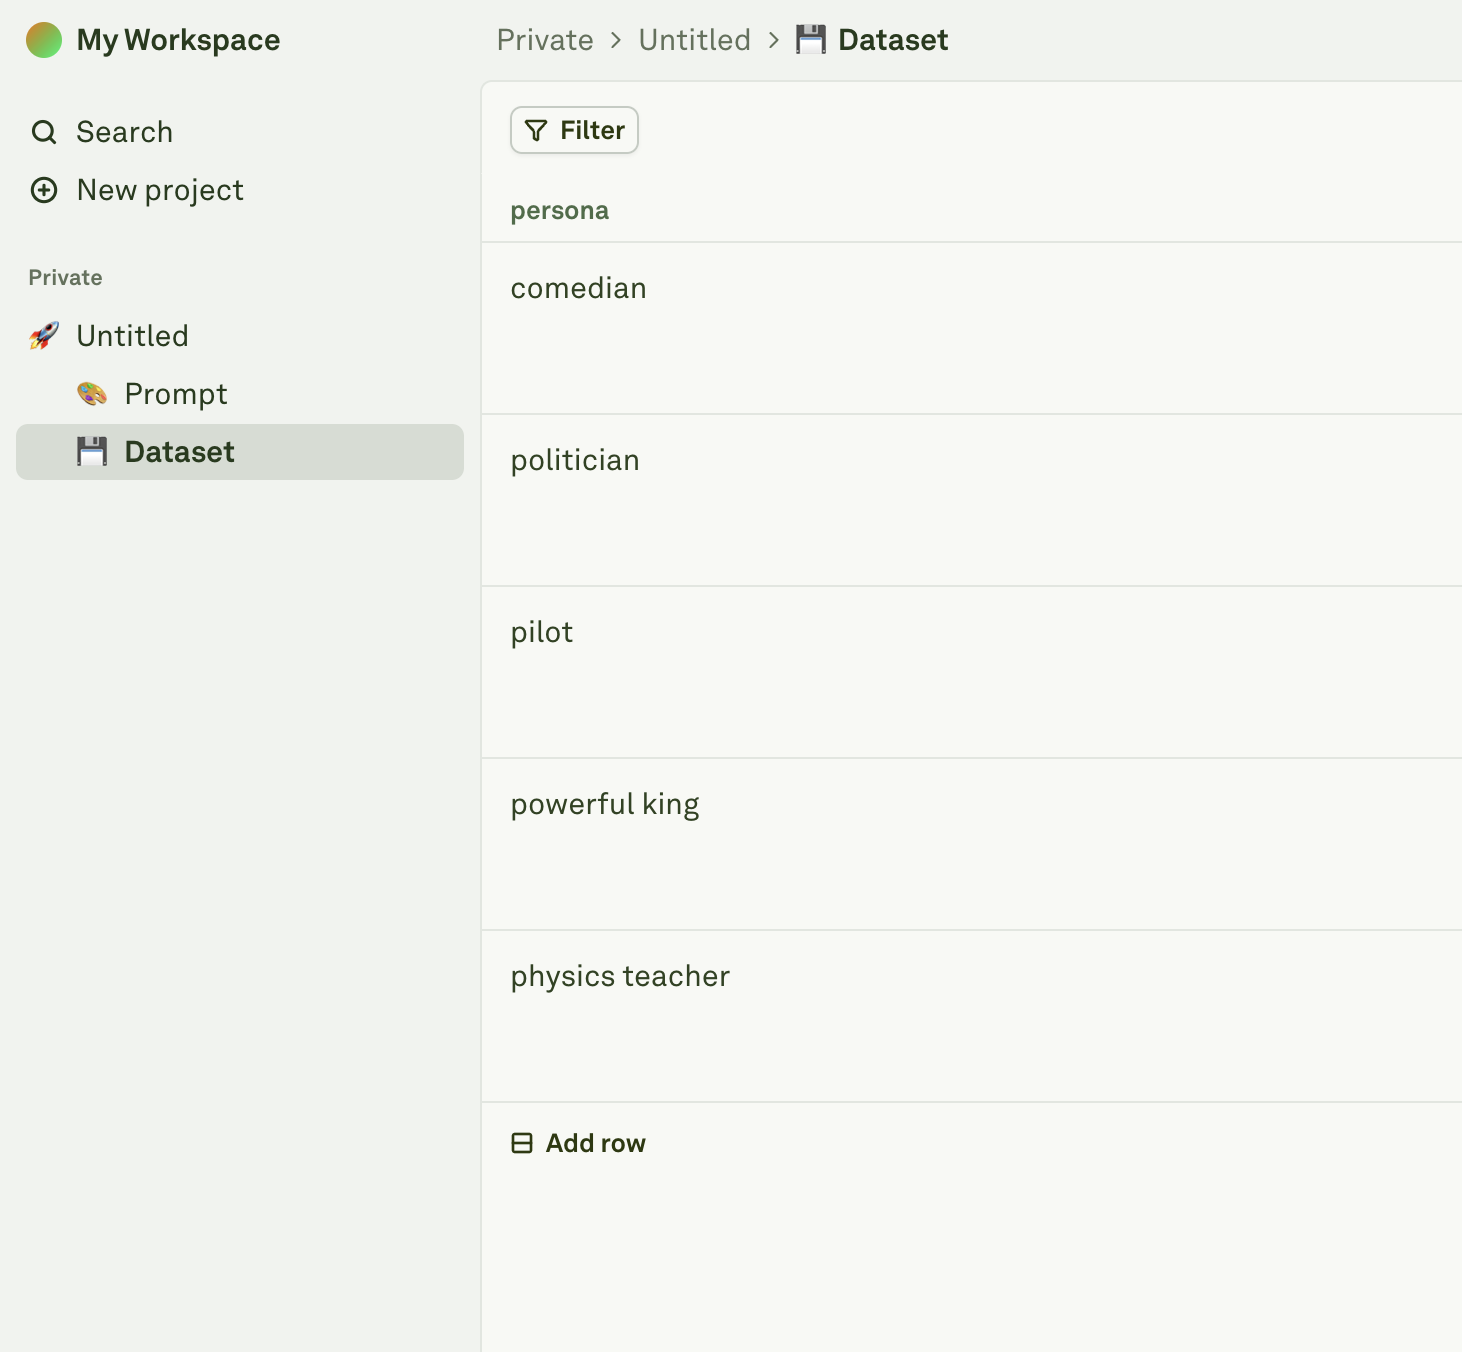
- Double-click the column name to rename it. Name the column to persona. Your dataset must have at least the columns exactly matching the variable names in your prompt to run evaluations.
- Click on Add row to add test cases.
- After you’ve added a row, double-click the cell to edit the value.
- Add 3-5 rows with different variable values to simulate various test cases.
Setup an Evaluator
An evaluator is an automated check to ensure prompt responses meet the specified quality criteria.- Click on Prompt again to exit the dataset.
- Click on Evaluate tab in the top bar.
- Click on Add Evaluator to view the list of supported evaluators.
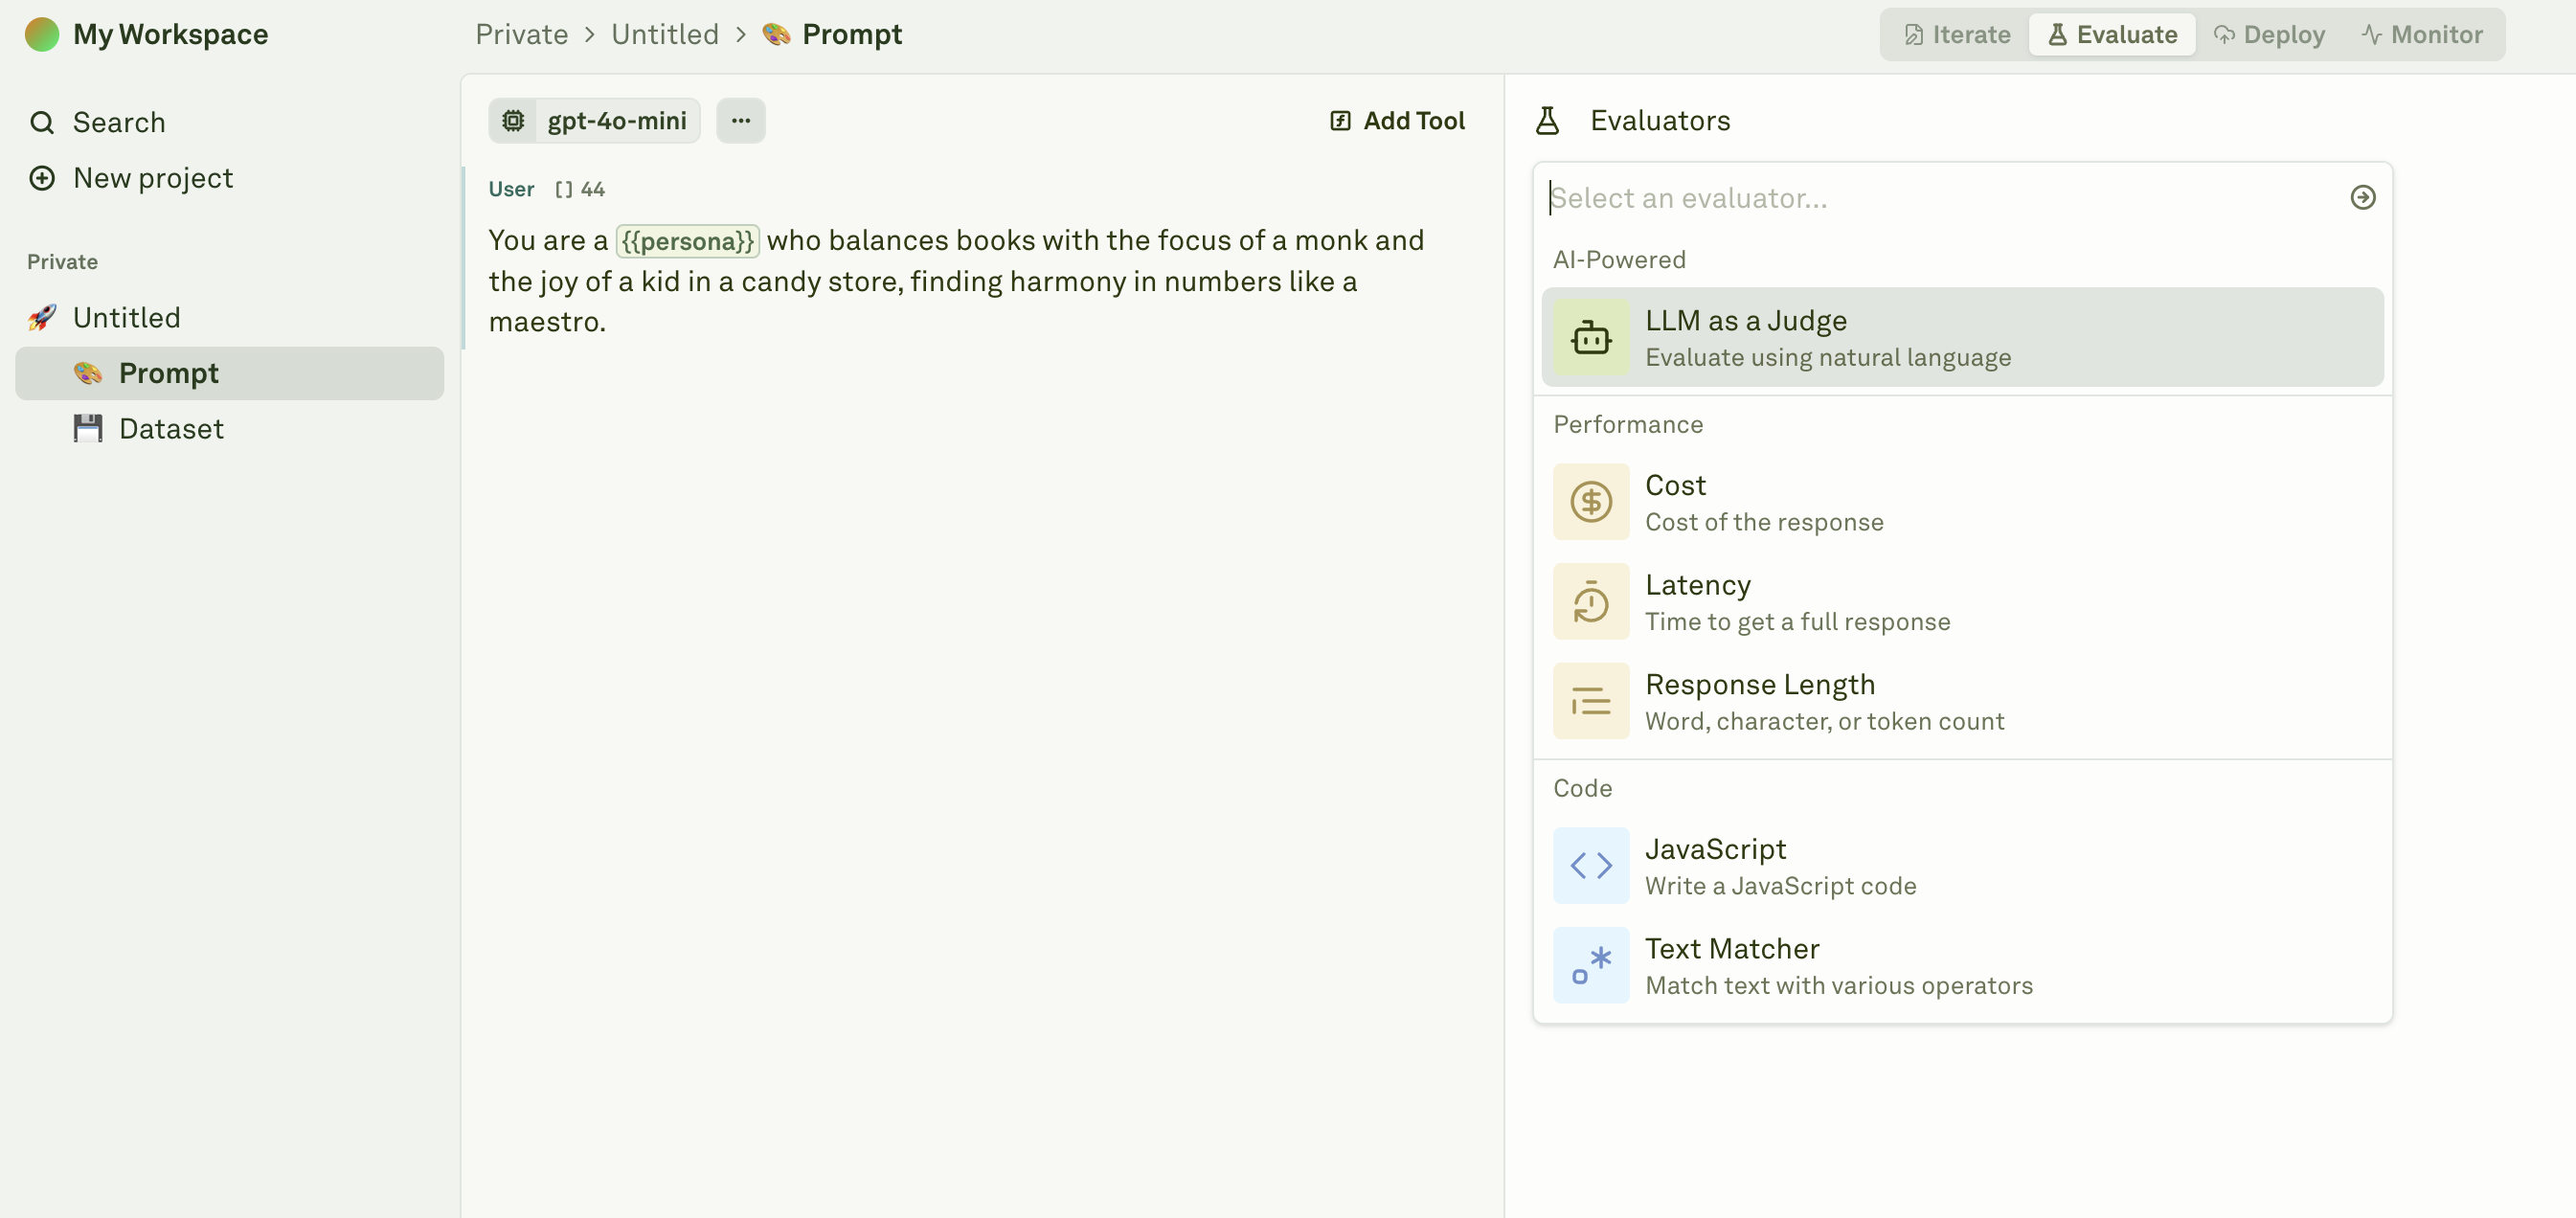
- Select LLM as a Judge from the dropdown.
- Click on Select a dataset to select the dataset you just edited.
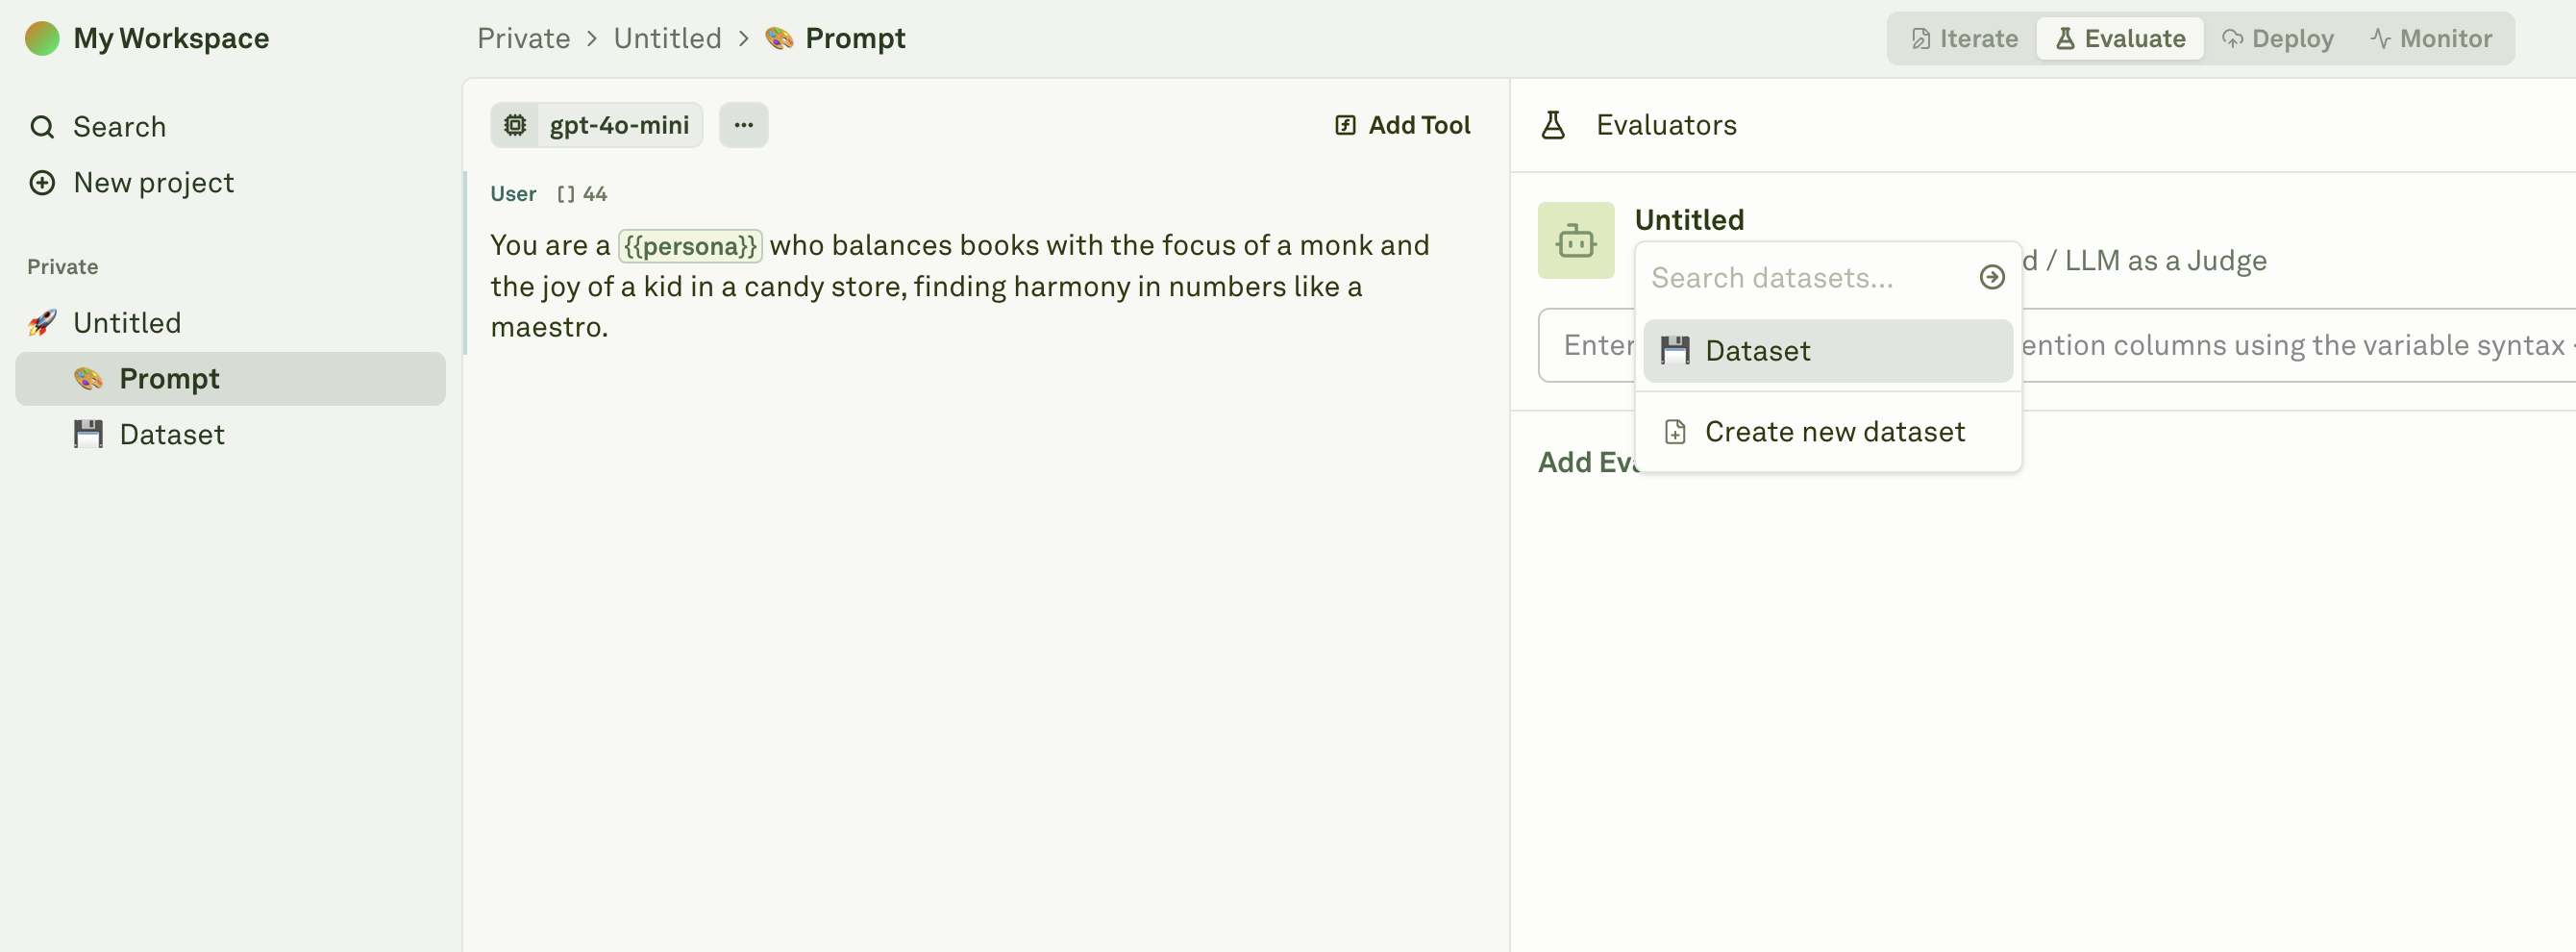
- Enter an evaluation rubric. For eg.

Run Your Evaluation
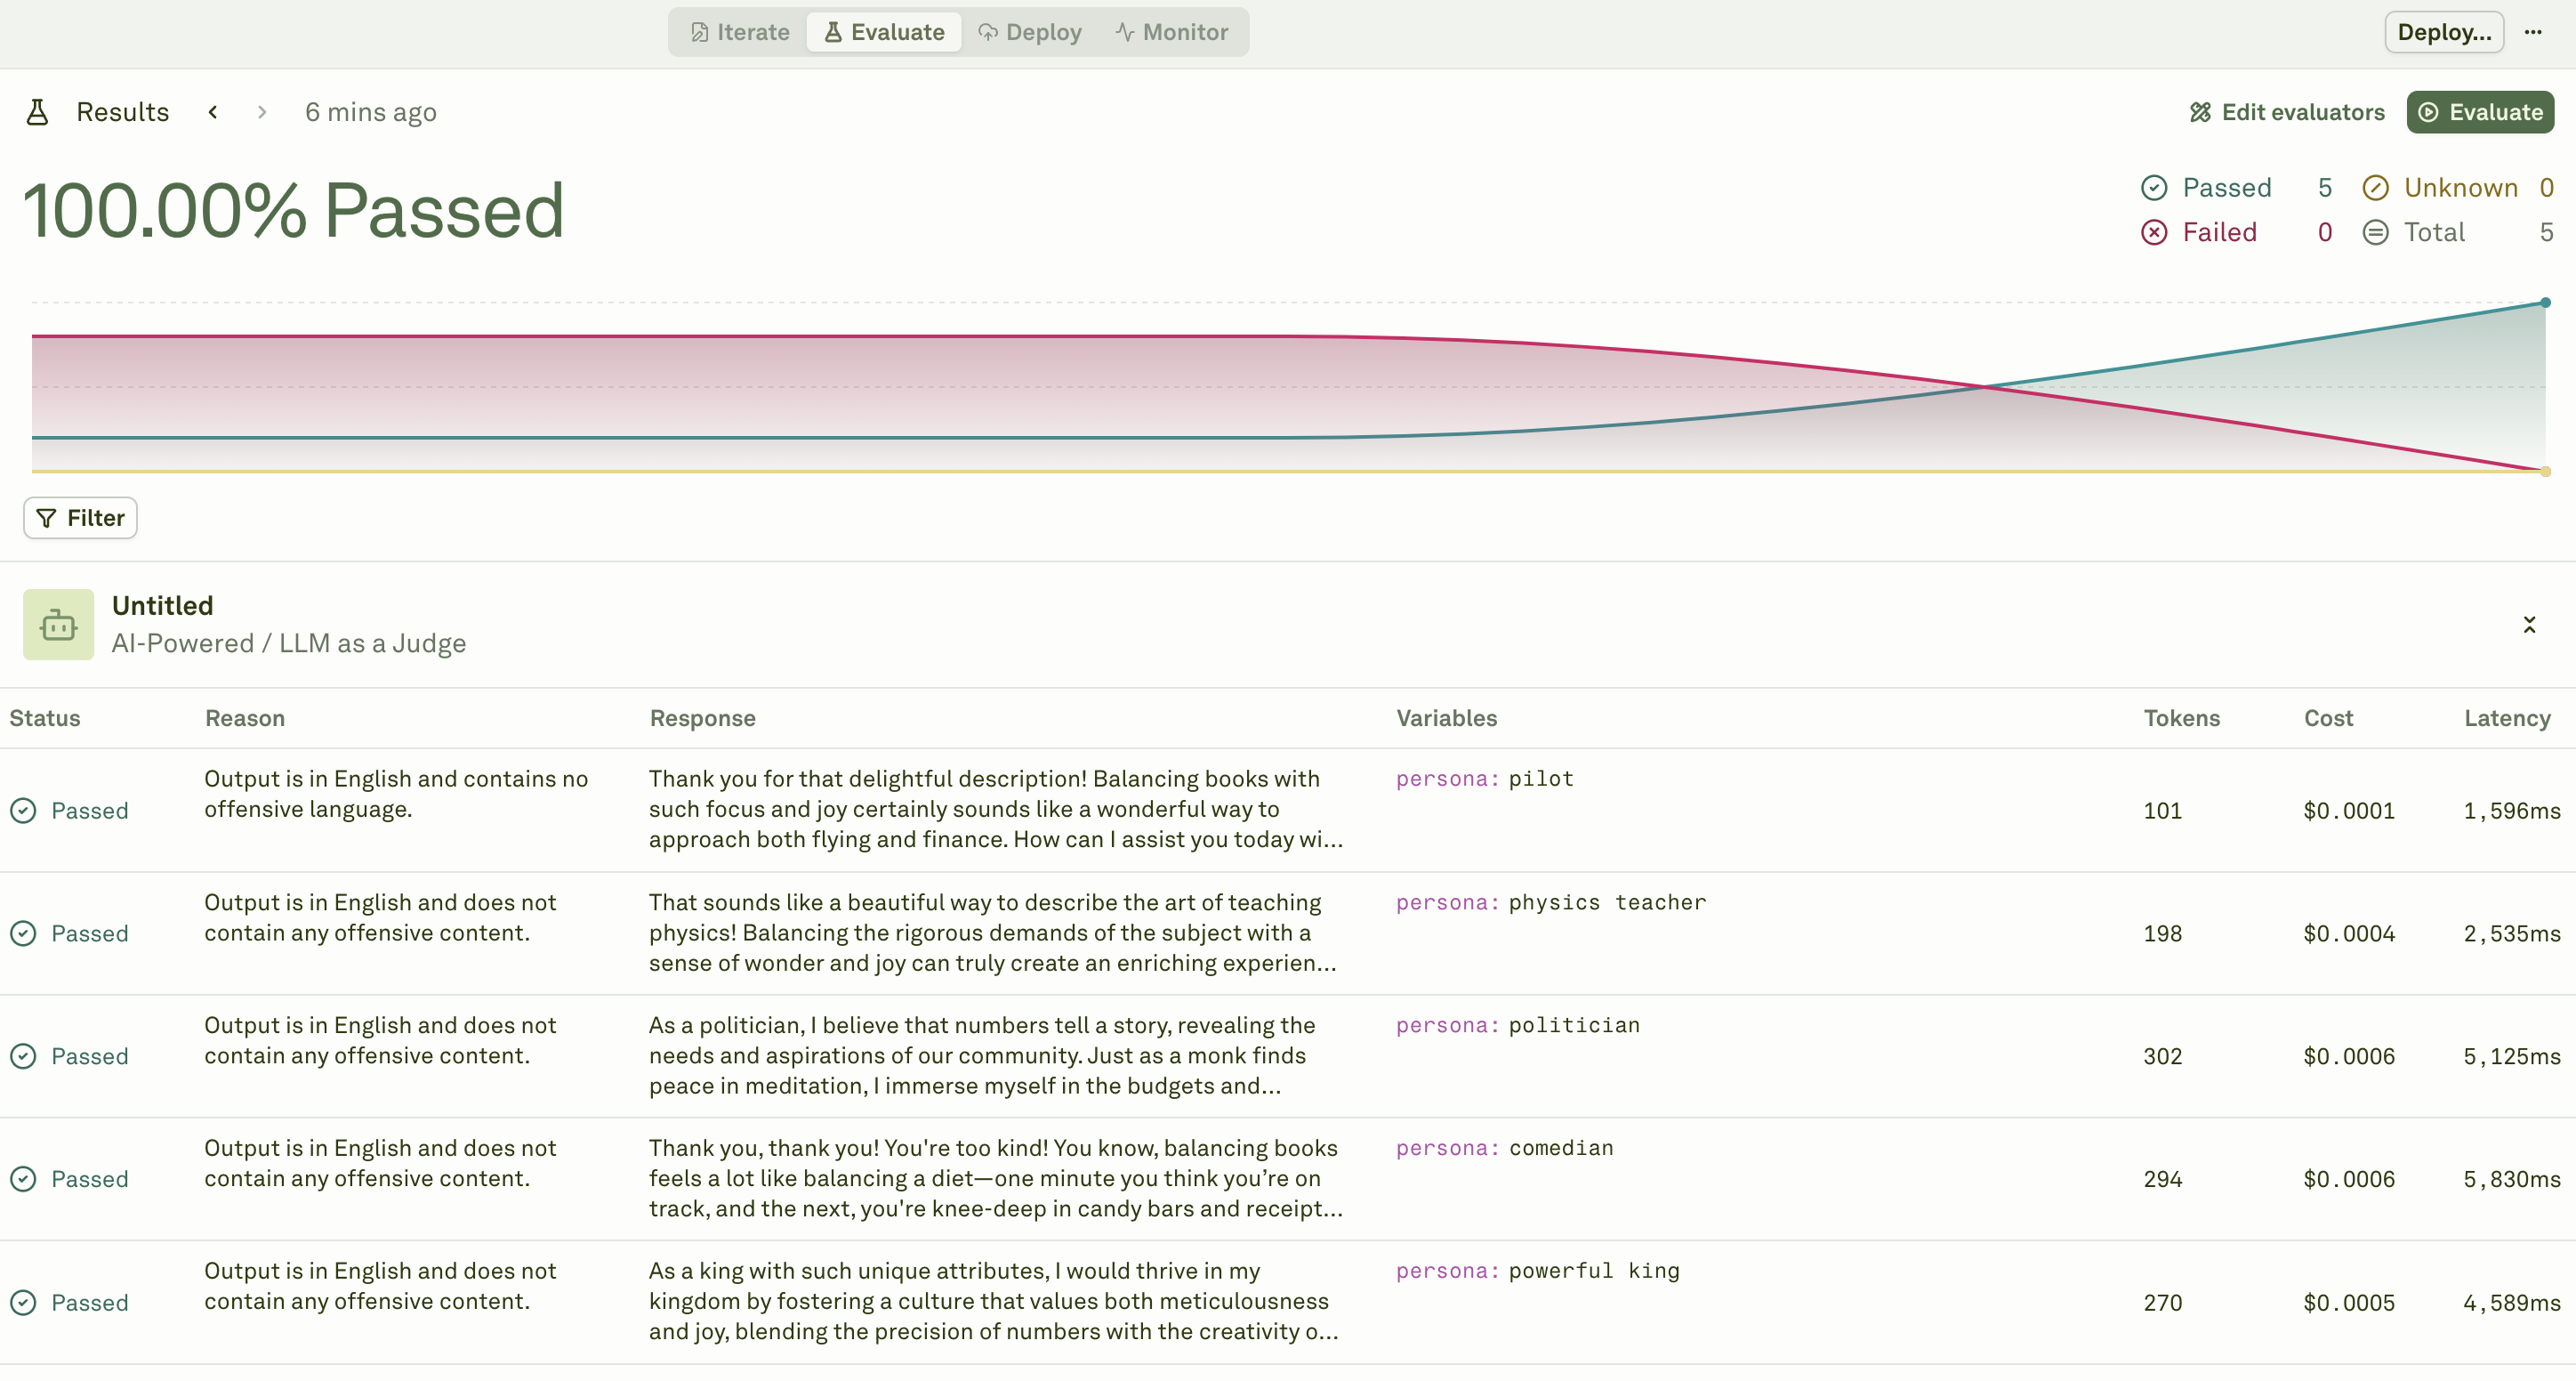
Evaluations run asynchronously by generating prompt response for each test case and then running all evaluators on each response.- Click Evaluate button on the top right.
- Wait for the evaluations to complete.
- Review the evaluation report at a glance for pass / fail status, token usage, cost, etc.
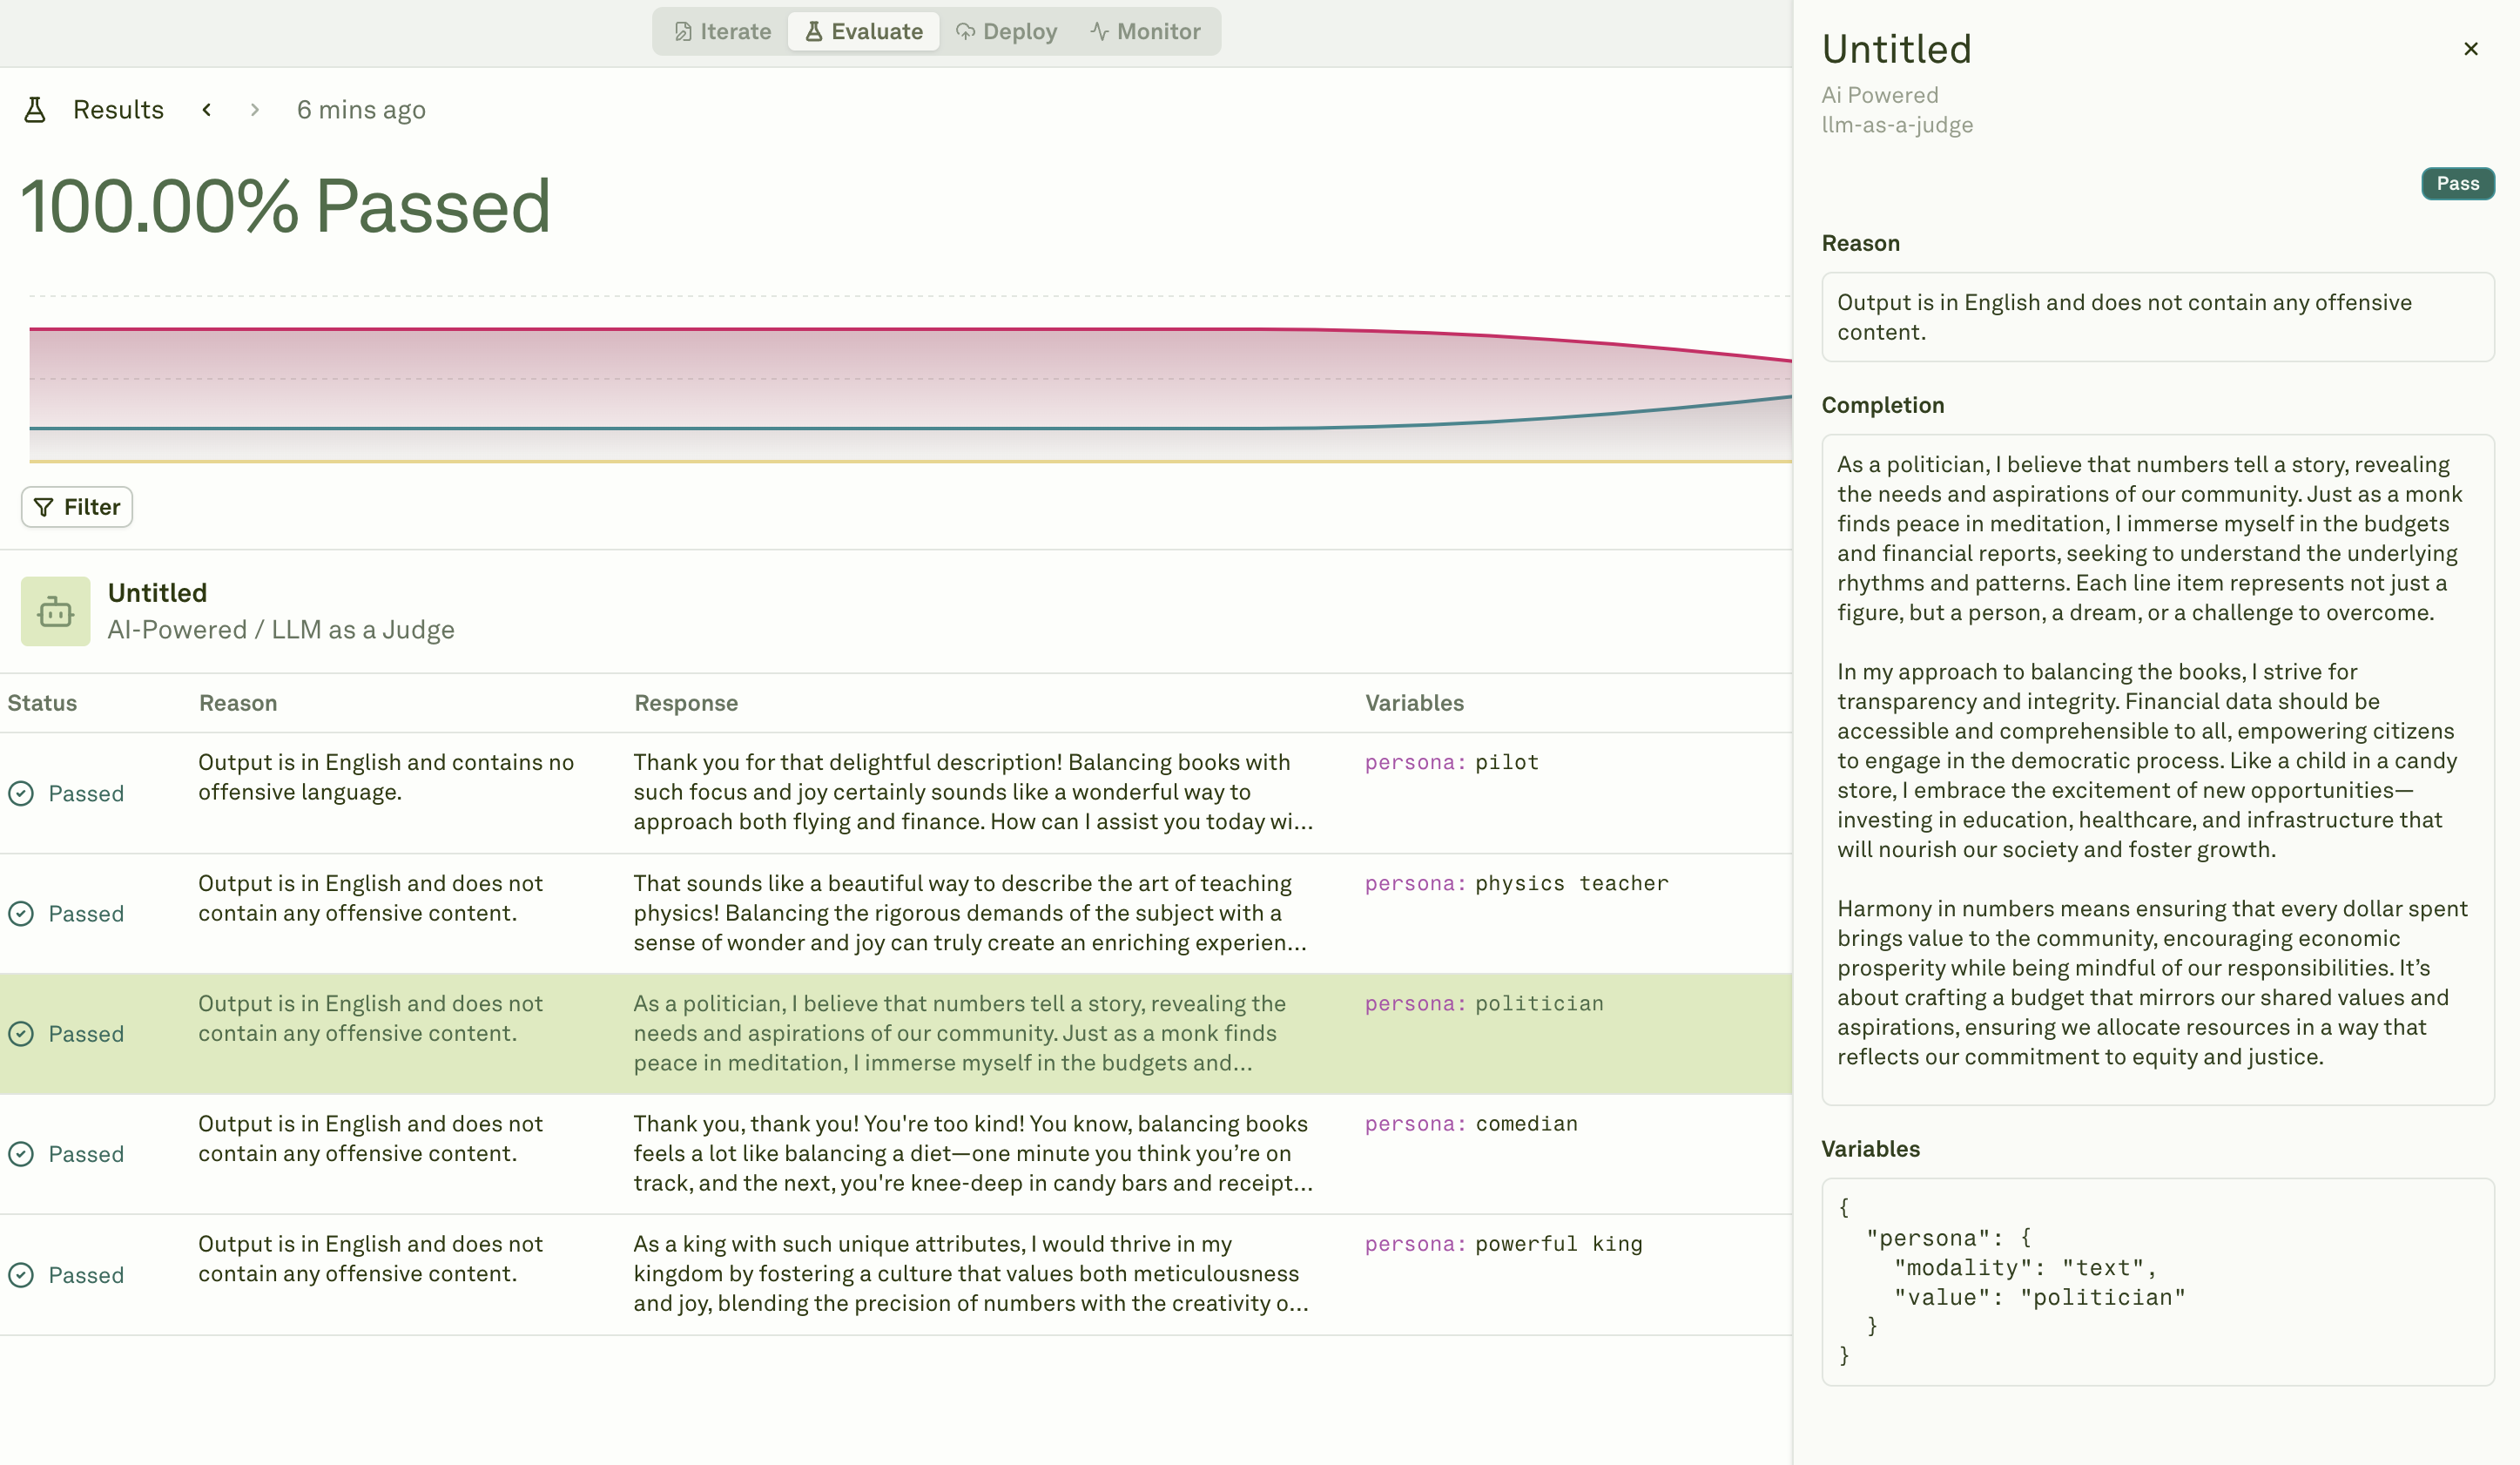
- Click on any individual test case to view the full response and evaluation results.
Next Steps
Now that you’ve successfully ran your first prompt and evaluated it, feel free to orchestrate new prompt ideas or bring your existing prompts to Adaline.- Sidebar will allow you to create, rename, and move folders, projects, prompts, datasets.
- A project can contain multiple prompts and datasets, each representing a node in a larger workflow or even an end-to-end workflow.
- To deploy a prompt to your application and monitor its performance, refer to this guide.